


The Ultimate Guide to Foam Clay: Everything You Need to Know
|
|
Time to read 3 min
Collabs
Quick Links
Account
|
|
Time to read 3 min
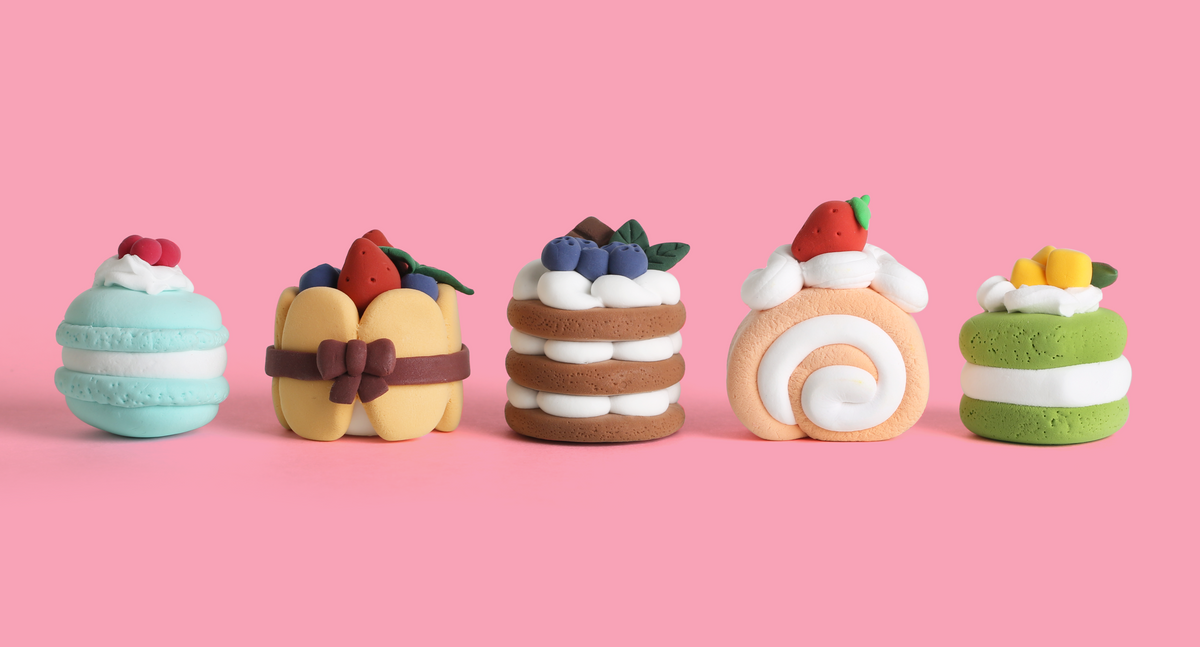
Foam clay is a lightweight, moldable material perfect for DIY projects and crafts. It's soft and easy to shape when wet, and it dries firm without cracking. Ideal for creating home decor and mini sculptures, foam clay is loved for its versatility and ease of use. Whether you’re a beginner or a seasoned crafter, foam clay helps you bring your creative ideas to life effortlessly.
Looking to get started? Claymoo offers DIY Foam Clay Kits perfect for a fun activity to kickstart your foam clay journey!
Foam clay is a popular choice for crafters due to its unique combination of properties that make it both easy to work with and highly versatile. Below are some of the key characteristics and benefits that set foam clay apart from other crafting materials:
There is a lot of confusion between foam clay, air dry clay. But essentially, foam clay is a type of air dry clay. It’s confusing because all of these different types of clays fit under the “air dry clay” category. Below is the comparison between three of the most popular types of air dry clay. For a more detailed comparison, see my blog post where I do a comprehensive comparison between the two materials.
| Air-Dry Foam Clay |
Air-Dry Modelling Clay |
Play-Doh |
|
Description |
Lightweight, pliable, and spongy material |
Denser with a smooth texture, similar to traditional clay |
Soft, pliable dough mainly used for kids' play |
Properties |
Lightweight, Dries to a flexible, slightly squishy texture, retains vibrant colors |
Dries hard and durable, can be sanded, carved, and painted |
Does not dry hard, becomes crumbly and cracks rather than drying into a solid, hard mass. |
Ease of Use |
Easy for beginners and children due to pliability and quick drying |
Requires more skill for detailed work, longer drying time |
Very easy for young children, non-toxic and safe |
Applications |
Crafting small decorative items, embellishments, mixed-media art projects, cosplay |
Creating detailed sculptures, functional items like pots and trays, advanced craft projects |
Simple shapes and models, educational play activities |
Always store unused foam clay in an airtight container or resealable plastic bag to prevent it from drying out. Ensure there's minimal air inside the container to maintain its pliability. Covering the clay with a damp cloth before sealing can help keep it moist.
Utilize tools such as toothpicks for adding fine details, sculpting knives for shaping and cutting, and small paintbrushes for smoothing and blending. Keeping a bowl of water and a damp cloth nearby can assist with blending and smoothing the clay as you work.
Before using foam clay, stretch and knead it thoroughly to remove air pockets and make it more pliable. Be cautious not to overwork the clay, as this can weaken its structure and increase the likelihood of cracks. Ensuring an even thickness throughout your project also helps minimize cracking.
When making rolls with foam clay, use your palms instead of your fingers to achieve a more even thickness. Rolling with your fingers can lead to uneven shapes and textures. Ensure you're rolling on a clean, smooth surface to prevent any imperfections in your clay.
If your foam clay starts to dry out, add a few drops of water to rehydrate it. Knead the water into the clay thoroughly to restore its moldability. Using a damp sponge or brush while working can help keep the clay moist and easy to shape.
Get inspired with 3 creative foam clay projects below! If you're not sure how to get started, be sure to check out our DIY foam clay kits, which include everything you need to begin crafting with foam clay. For more ideas checkout our 5 DIY Foam Clay Ideas blog post.
@claymoo.co A really pretty DIY idea if you have extra picture frames laying around the house. #clay #airdryclay #polymerclay #foamclay #DIY #DIYidea #craft #craftideas ♬ Coffee - beabadoobee
@claymoo.co Making a trinket with super light foam clay hehe. Clay idea for yall to try #clay #polymerclay #art #craft #trinkets #clayideas ♬ son original - justanunknownstar
@claymoo.co DIY soft air dry clay tutorial for a night light! 🌸 If you love to learn more about sculpting with this type of clay, check out our DIY kits 😉😉 Link in bio! #clayart #claykit #polymerclay #crafting #DIYProjects #diyideas #craftidea #clayidea #giftidea #diykit #softairdryclay #foamclay #diykit #learntosculpt ♬ Vlog ・ Stylish city pop(1275391) - orino
We sell DIY foam clay kits, but if you’re looking to just buy bulk foam clay, we recommend getting BOHS foam modelling clay.
